What to start with?
Signing up with E-EyE is very easy and straight forward but it gets tricky when comes to making up and preparing the gear. As there is no-one standing 24x7 next to your gear, have you thought about all the eventualies that could happen your your kit in 2000km distance?
-
What needs to happen if there is a power-loss, internet down, computer problem?
-
What needs to happen when weather conditions change, e.g. clouds coming up?
-
How to open/close the roof?
-
How to you open/close the scopes cap?
-
How to do Flats?
-
How do you switch your kit on and on?
-
Can your mount be controlled remotely?
-
Whats happens if you havent put your mount into park mode and you startup your mount?
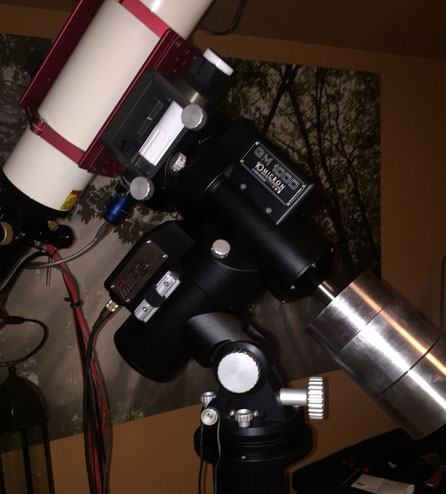
10Micron 1000HPS Mount
This is not a review of the mount but probably one of the best options when you go for remote imaging. Having tested the 1000HPS for some months, i can say its the best mount i ever had. No requirement of guiding at my focal lenght and the fully automated initialisation are a big plus. When using it mobile, all i do is doing a polar alignment and running the Modelmaker which runs for <10 minutes setting up a 25 stars or more model fully automated. No requirement for a hand-controller.
One of the most useful features for running this mount remotely are its encoders. The mount always knows where it is pointing to, even after a power-cut or switching the mount off without bringing it to a park position before. Additonally, not having the requirement to autoguide, managing imaging sequences becomes much easier. The built-in ability to switch the mount on and off by a relay should be mentioned as well.

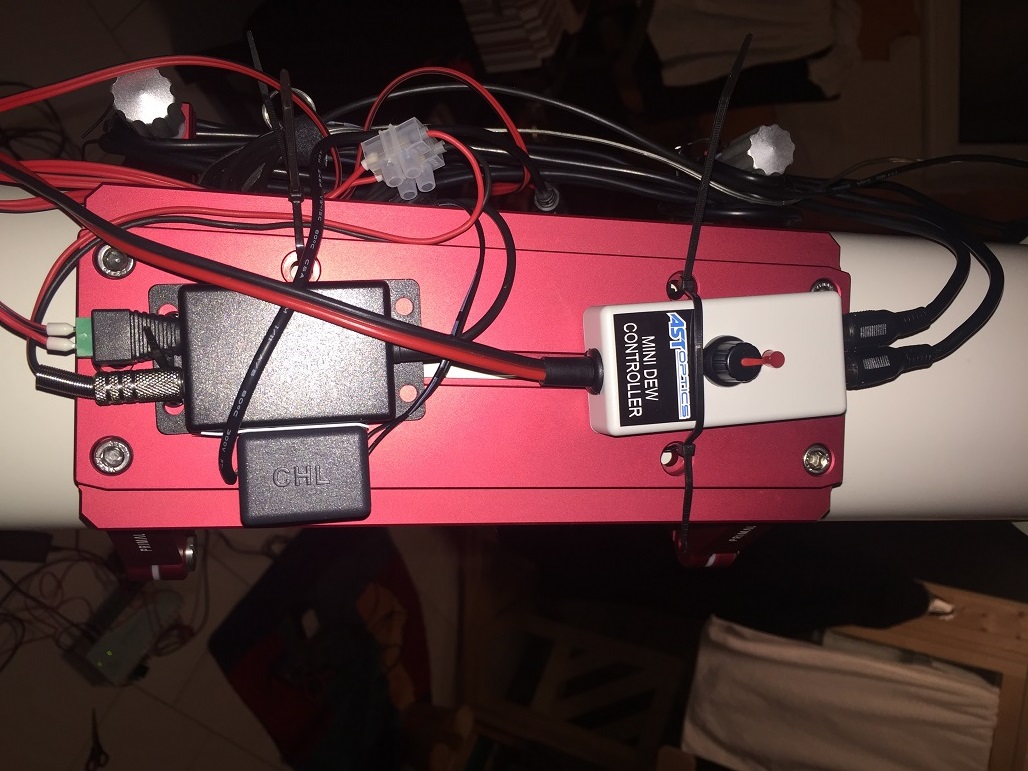


Gemini's SnapCap
I have chosen this one because of its integrated Flat panel and ability to open fully at 270°. Its powered by two supplies (Motor/Flat-Panel) but needs three power inputs which is a bit annoying as it requires me to run 3x2 wires to the unit.
Thats because the Motor-Power supply requires one permanent powered 12v source and one 12v to open/close. The 3rd 12v connection switches the Flat panel on/off.
To keep the cables light-weight, i used 0.4qmm wires. The power usage is rated at 0.05A so 0.4qmm is still more than enough. Running the motor and flat at 13.8v did not cause any issues but the motor is running a bit longer than operating at 12v. You have to be aware of this when configuring the open and stop position. Obviously, if you do this its at your risk.
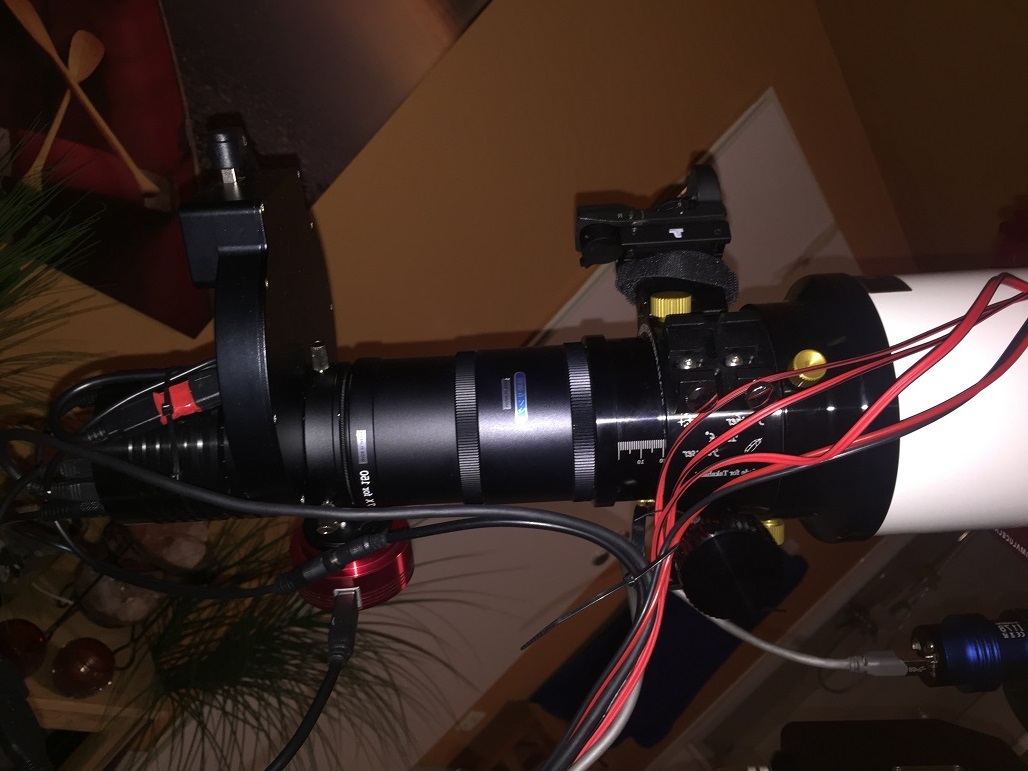
Starlight Xpress Trius 694 + ZWO FW + ASI 120MM-S
The rather small Sony CCD fits very well to the TSA. No major issues with tilt or vignetting. 1.25" filters can be used and the ZWO Filterwheel holds 8 of them, so LRGB and Ha/O3/S2 plus a dark filter can be used. With the ZWO OAG the gear is still well below 55mm and attached to the Reducer using a M56 to M48 Adapter.
The ASI 120MM-S and the filterwheel connect to the Trius built-in USB-Hub. By doing this, there is one USB cable doing from the imiging-gear to the comuter only.
As you can see on the pic, there is one USB Cable (Trius) and 5x 12v cables (3x Snapcap, 1x Dew, 1x Trius). The 2nd picture shows the Borg ED 36 wide-field scope with the QHYIII-178.


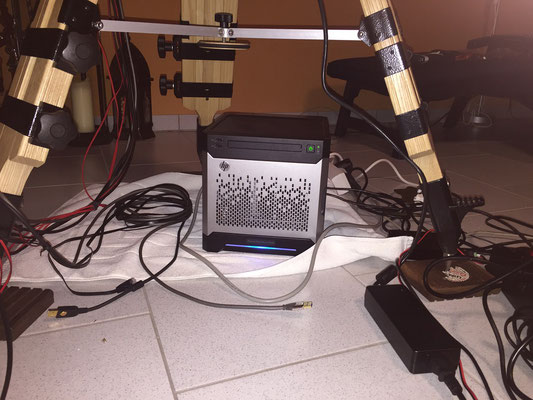
HP Microserver Gen8
Offering 2x USB3 and 4x USB2 out of the box, its low price, low power usage, the the ability to have IP based Keyboard/Mouse/Video and remote power off/on made this purchase a no-brainer.
Lunatico's Dragonfly
Most probably, 90% of the time i needed for preparation was used to plan and configure this unit. Simply spoken, its an IP-based relay to switch devices on and off. On one side of the device you connect your sources, the other side connects to the devices.
You can use any voltage up to 230v so i am switching the CCD's power-supply on and off (230v). Other devices like the dew-heaters, flat-panel get powered from a 12v source.
The unit also uses sensors so i connected a simple 4€ 12v power supply + 3€ relay to one of the sensor ports. All my kit is protected from power loss using a UPS (battery). However, this relay is connected before the UPS, so its unprotected. If the observatory loses power, the relay closes and the Dragonfly can run a script to e.g. close the roof, power down the mount, computer, send an alarm etc.
The Cloudwatcher and roof control are not connected at this stage but will be onsite.

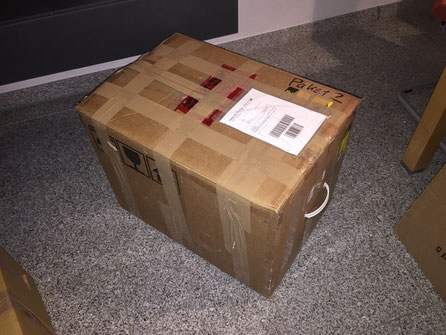
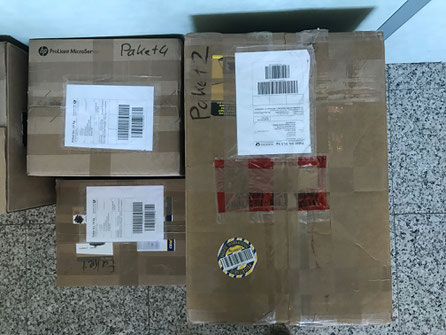
Ready to ship! End of Jan i started shipping the first packages incl. the mount. It shoudn't take more than 2-3 days to Spain but who knows.
Because of the expensive goods, i insured it as high as possible with DHL.
I kept the original packaging of the mount so this should be fine. You can buy a new packaging from 10Micron for 100€ though!
Today, exactly one week later, Jose informed me that the three packages arrived! Cannot say that i slept very well over the last week :)
Next is the scope but will use DHL Express. I do not want the scope to be travelling for a week.
(update) Last pieces sent today, 07.02. . Next will be setting the whole thing up!